
How to Fix Xcode Build Failures: A Complete Step-by-Step Guide for Developers
When Xcode Refuses to Build
If you’ve ever hit “Run” in Xcode only to see a flood of red error lines, you know that sinking feeling all too well. One moment, your iOS app seems perfect — and the next, Xcode build failed appears like a nightmare.
Whether you’re a beginner experimenting with SwiftUI or an experienced developer maintaining a large iOS project, Xcode build failures can feel frustrating, time-consuming, and sometimes completely mysterious.
But here’s the good news: most build errors have clear causes and easy fixes — if you know where to look.
By the end of this guide, you’ll learn exactly:
✅ Why Xcode build failures happen
✅ How to fix them step by step
✅ Pro troubleshooting tips that even senior developers use
✅ And how to prevent them in future builds
So, let’s turn those red errors into green checkmarks!
Why Xcode Build Failures Happens
Every time you hit “Build” in Xcode, it’s compiling hundreds (sometimes thousands) of files, linking frameworks, generating binaries, and signing your app.
If anything in that process breaks — from missing dependencies to code signing issues — your project fails to build.
For solo developers, that means wasted hours.
For teams, it could delay entire releases.
For freelancers, it could even mean missing a client deadline.
In short, knowing how to fix Xcode build failures isn’t just a technical skill — it’s a productivity superpower.
Let’s go through it step by step.
Step-by-Step Guide: How to Fix Xcode Build Failures
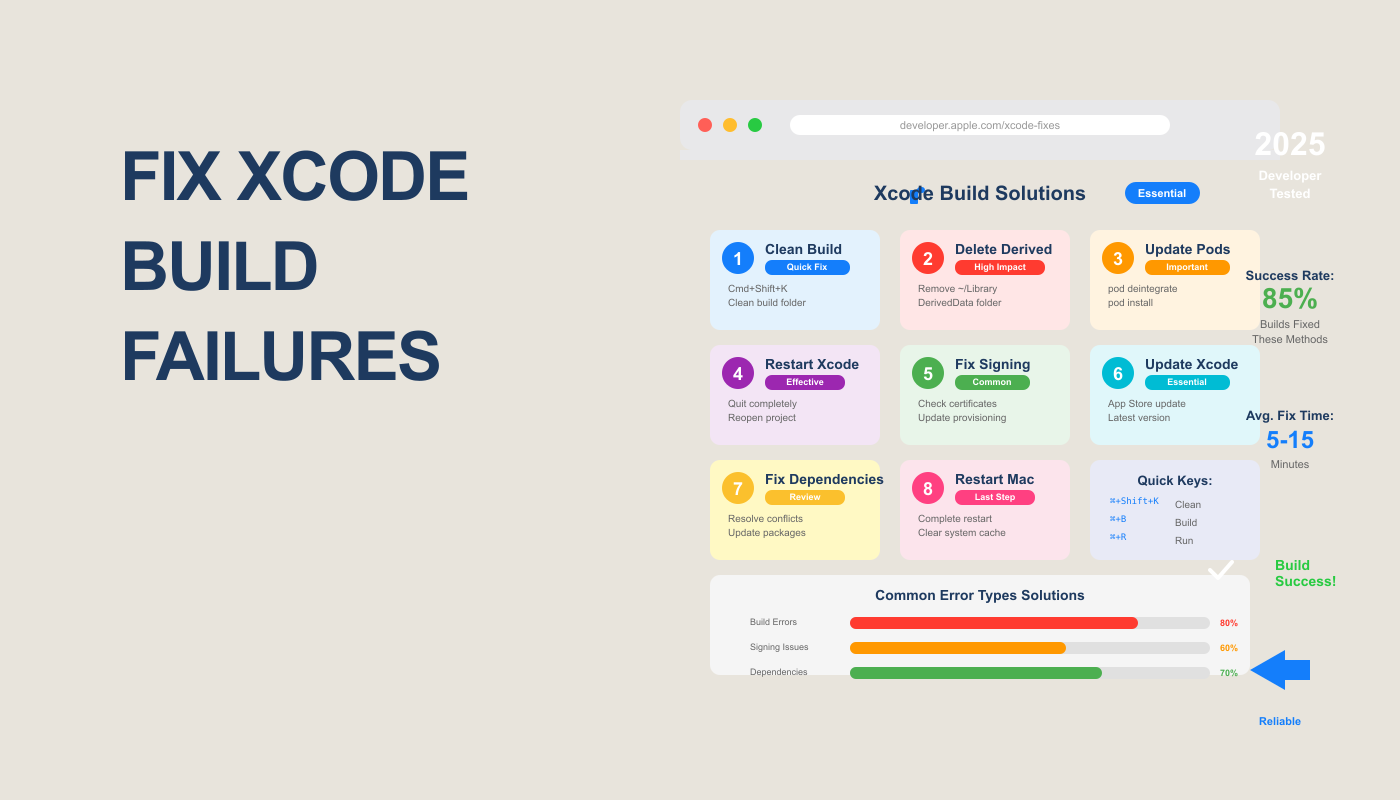
Step 1: Clean Your Build Folder (The Magic Reset)
When in doubt — clean it out.
Xcode often stores old build data that can conflict with new changes.
Here’s how to fix it:
- Go to the top menu → Product → Clean Build Folder (⇧ + ⌘ + K)
- Then rebuild your project.
If that doesn’t help, do a deep clean:
- Close Xcode
- Delete the DerivedData folder:
~/Library/Developer/Xcode/DerivedData - Reopen Xcode and build again
Pro Tip: Cleaning removes cached builds, so your next build may take longer — but it often solves 70% of mysterious errors instantly.
Step 2: Check Your Dependencies (CocoaPods, Swift Packages, etc.)
Sometimes, your project’s dependencies are the problem — not your code.
If you’re using CocoaPods, run:
pod install
pod update
For Swift Package Manager (SPM) projects:
- Go to File → Packages → Reset Package Caches
- Then Resolve Package Versions
📌 Common Issue:
If you see an error like
“Module ‘XYZ’ not found”
it’s likely due to missing or outdated dependencies.
✅ Fix:
Update your pods or packages and rebuild.
Step 3: Fix Code Signing & Provisioning Profile Issues
One of the top reasons for Xcode build failures — especially on physical devices — is incorrect code signing settings.
Go to:
➡️ Project Navigator → Target → Signing & Capabilities tab
Check these:
- “Automatically manage signing” is enabled
- The correct Apple ID/team is selected
- Your provisioning profile and certificate match
🧩 If you see:
“No matching provisioning profiles found”
Log into your Apple Developer account, refresh your profiles, and re-download them.
🧠 Pro Tip: Always use the same Apple account for your Xcode signing settings and your Apple Developer profile to avoid mismatches.
Step 4: Resolve Outdated or Missing Frameworks
Xcode may fail to build if a linked framework or library was removed, renamed, or updated.
Fix it by:
- Opening Build Phases → Link Binary with Libraries
- Checking for any framework marked as red or missing
- Removing or re-adding the correct version
Example error:
“Library not found for -lPods-AppName”
✅ Solution: Run pod deintegrate followed by pod install to refresh the connection.
Step 5: Check for Syntax and Logic Errors
Sometimes, it’s not the setup — it’s the code itself.
Look for:
- Unused imports
- Missing semicolons (for Objective-C)
- Typos in function names
- Incorrect data types
💡 Shortcut:
Use ⌘ + B to quickly trigger a build and locate the first line of failure.
Xcode’s Issue Navigator (⌘ + 4) is your best friend here — it shows all compile-time and runtime errors in one place.
Step 6: Update Xcode and iOS SDK
Compatibility is a silent killer of builds.
If you updated macOS or installed a new iOS version, older Xcode builds might not support the latest SDKs.
Fix:
- Update Xcode via the App Store or Apple Developer portal
- Go to Xcode → Preferences → Locations → check that the correct Command Line Tools version is selected
✅ Always keep Xcode, macOS, and iOS SDKs aligned to prevent outdated toolchain conflicts.
Step 7: Check Build Settings and Architectures
Another common cause of Xcode not building is mismatched architectures or build settings.
Go to:
➡️ Project → Build Settings → Architectures
Ensure that both Project and Target settings are consistent (e.g., both set to “Standard Architectures (arm64)”).
If you’re working with frameworks, make sure “Build Active Architecture Only” is set to NO for Release builds.
Pro Tip: This step helps prevent linker errors like:
“Undefined symbols for architecture arm64”
Step 8: Reset Xcode Preferences
If you’ve tried everything and it still fails — Xcode itself might be misbehaving.
Reset it by:
- Quitting Xcode
- Deleting its preferences:
rm ~/Library/Preferences/com.apple.dt.Xcode.plist - Restarting your Mac
This gives you a clean slate without deleting your projects.
Expert Tips to Avoid Future Xcode Build Failures
Let’s make sure you never face this pain again.
- Use Version Control (Git)
Always commit before making major dependency or configuration changes. - Use Consistent Tool Versions
Keep your entire team on the same Xcode version to avoid environment mismatch errors. - Automate Builds with CI/CD
Use services like GitHub Actions, Bitrise, or Fastlane to test builds automatically.
(You can read our upcoming blog on “How to Automate iOS Builds with Fastlane.”) - Document Common Errors
Maintain a shared “Troubleshooting Log” within your project’s README — it saves hours for teams.
You’ve cleaned your build folder, checked your dependencies, and even fixed your code signing — yet Xcode still refuses to build.
Sound familiar? Don’t worry — you’re not alone.
Even professional iOS developers face recurring build issues. But the difference between hours of frustration and a quick fix often comes down to understanding what the error message is actually saying.
Let’s break down the most common Xcode build failure messages and how to fix each one.
⚠️ 1. “Command PhaseScriptExecution failed with a nonzero exit code”
This is one of the most infamous Xcode build errors — it usually appears after running pod install or adding a new script phase.
Possible causes:
- Missing permissions in the script
- Incorrect path references
- Outdated build scripts (e.g., from Fastlane, React Native, or Flutter integrations)
How to fix it:
- Go to Build Phases → Run Script Phase
- Check the script’s shell path — it should be
/bin/sh - Ensure all file paths exist (especially
Pods/directories) - Run this command in Terminal:
chmod +x script_name.shThis gives your script execution permission.
✅ Pro Tip:
Always use absolute paths when referencing build files in Xcode scripts to prevent directory confusion.
⚠️ 2. “Undefined symbols for architecture arm64”
This error usually points to mismatched architecture support between your app and one of its libraries.
Why it happens:
- You’re linking a simulator-only library on a physical device build (or vice versa)
- The library isn’t compiled for arm64 (used on Apple Silicon)
How to fix it:
- Go to Build Settings → Architectures
- Ensure both Project and Target use:
Standard Architectures (arm64) - If using third-party frameworks, verify they include arm64 slices by running:
lipo -info path/to/framework.framework/Framework
If the output doesn’t include arm64, that framework must be rebuilt or replaced with a compatible one.
⚠️ 3. “No such module” or “Module not found”
This is a dependency issue and one of the easiest to fix.
Why it happens:
- CocoaPods or SPM didn’t link properly
- The framework search paths are incorrect
Quick fix:
- Run
pod deintegrate - Then
pod install - Finally, clean build folder and rebuild
If you’re using Swift Package Manager:
- Go to File → Packages → Reset Package Caches
- Rebuild
🧠 Pro Tip:
Never manually drag frameworks into your Xcode project. Always integrate them using Pods or SPM to avoid path issues later.
⚠️ 4. “Could not find Developer Disk Image”
You’ll encounter this when your device’s iOS version is newer than the Xcode version.
Fix:
- Update Xcode to the latest stable release via the Mac App Store
- Or, download the correct Developer Disk Image from Apple’s developer portal and place it inside:
/Applications/Xcode.app/Contents/Developer/Platforms/iPhoneOS.platform/DeviceSupport/
Then reconnect your device and rebuild.
✅ Shortcut Tip:
If you’re testing beta iOS versions, always use Xcode Beta from Apple’s site to avoid compatibility mismatches.
⚠️ 5. “Code signing is required for product type ‘Application’”
This appears when Xcode can’t locate the correct signing identity or provisioning profile.
Steps to fix:
- Go to your Target → Signing & Capabilities tab
- Enable Automatically manage signing
- Select the correct Apple ID and team
If you’re using manual signing:
- Ensure both the certificate and provisioning profile match in Apple Developer Account.
- Delete old certificates if needed and generate new ones.
Bonus Tip:
If you’re using CI/CD (like Fastlane), include match to automatically sync certificates and avoid manual signing headaches.
Real Case Example: A Developer’s 2-Hour Build Nightmare
Let’s say you’re building a Flutter iOS app, and suddenly your build starts failing with:
“ld: framework not found FirebaseCore”
You panic — everything was working yesterday!
Here’s how a pro would fix it:
- Run
pod repo updateto refresh Pod sources. - Delete the
Podfile.lockfile. - Run
pod installagain. - Clean build folder.
- Rebuild — success.
👉 Lesson: Most Xcode build errors come from dependency mismatches, not broken code.
Pro Tips to Speed Up Xcode Builds and Avoid Failures
Fixing build failures is one thing — preventing them forever is where pros stand out.
Here are expert-level optimization tips for stable, lightning-fast builds:
1. Use Incremental Builds
Xcode supports incremental compilation, but it works best when your codebase is modular.
Split your code into smaller modules or frameworks so that Xcode doesn’t rebuild everything after minor changes.
2. Disable Unused Architectures
Go to:
Build Settings → Excluded Architectures
Add:
armv7
i386
This helps reduce unnecessary compilation and errors.
3. Keep Dependencies Updated
Outdated libraries can break builds when new Xcode versions release.
- Use
pod outdatedregularly. - Update Swift Packages monthly.
4. Use Continuous Integration
Tools like GitHub Actions, Bitrise, and CircleCI can automatically build your project after every commit.
If the build fails, you’ll know before it reaches production.
5. Maintain a Stable Environment
Don’t mix Xcode beta and stable versions unless absolutely necessary. Always match:
- macOS version
- Xcode version
- iOS SDK version
Keeping consistency across your dev team reduces unexpected build errors.
Comparison Table: Manual Debugging vs Automated CI Build Testing
| Feature | Manual Debugging | CI/CD Automated Build |
|---|---|---|
| Error Detection | After manual run | Instantly after commit |
| Speed | Slower | Faster (parallel) |
| Collaboration | Local only | Team-wide visibility |
| Error History | Lost after fix | Stored in build logs |
| Efficiency | Developer-dependent | Consistent and trackable |
If you’re serious about app reliability and faster development, integrate CI/CD early in your workflow.
Frequently Asked Questions (FAQs)
1. Why does Xcode keep failing to build after an update?
When Xcode updates, old DerivedData, caches, or incompatible dependencies can cause conflicts.
Fix: Clean build folder, reset packages, and recheck build settings.
2. Can a macOS update cause Xcode build issues?
Yes — sometimes new macOS versions include updated SDK paths or stricter signing policies.
Always update Xcode after upgrading macOS.
3. How do I know which file caused the build to fail?
Use Xcode’s Issue Navigator (⌘ + 4) — it shows detailed error logs with the exact file and line number causing the failure.
4. Is it safe to delete DerivedData?
Absolutely. DerivedData only stores temporary build artifacts. Deleting it is often the first step in solving weird build bugs.
5. What if none of these fixes work?
If you’ve tried everything and still can’t fix the build:
- Delete and re-clone your project from Git
- Reinstall Xcode
- Check for file permission issues
Sometimes, a fresh setup solves hidden config corruption.
Conclusion: Turn Build Failures into Build Mastery
Every developer hits the wall of Xcode build failures at some point — but it’s not the end.
It’s just Xcode’s way of telling you, “Hey, something needs attention.”
By now, you’ve learned:
- What causes build failures
- How to systematically fix them
- Expert strategies to prevent them in the future
So, next time you see that dreaded red “Build Failed” banner — take a breath.
Run through these steps confidently, and you’ll have your app running smoothly again in minutes. ⚙️💡
Pro Tip Before You Go:
Keep a personal “Xcode Fix Log” — every error you solve today becomes a quick win tomorrow.
Internal Link:
You can also read:
How to Fix icloud sync issues
External Link:
Learn more about Xcode Build Settings on Apple’s Official Developer Guide.
#XcodeBuildError #iOSDevelopment #Swift #XcodeTips #RankWeb3

One Response